 |
| Coin Door. Remove paint to expose rust. |
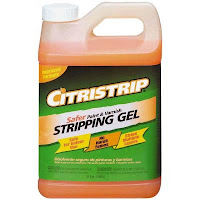
The first step was to strip the powder coating/paint off of any metal object and then see just how much rust I was dealing with. To do this, I used CitriStrip. This stuff works like magic. Place the object to be stripped in a shallow tray, coat the object in CitriStrip (I found a paint brush works best), wait the recommended time, and then use a metal scraper/wire brush to remove the paint. Repeat until all paint is gone.
 |
| Why would they make it smell good if the fumes are still toxic...? More importantly, does it taste as good as it smells? |
With the the brunt of the work taken care of it was now time to move onto replacing parts. The coin door locks were easily replaced using cam locks bought at home depot. Another lock was purchased for the new back door that I made. I decided on using a reproduction control panel overlay rather than hunting down NOS. The new overlay was ordered from Game On Grafix and I was extremely satisfied with the product. The original marquee light was not working so it was removed and easily fixed by splicing in a cheap replacement. New buttons and microswitches were ordered to replace the old damaged leaf-style buttons. I decided on using the original sticks and just changing the microswitches because the sticks were found to still be sound.


No comments:
Post a Comment