Labels

Tuesday, November 17, 2015

Contra Konami Cabinet Restoration - Part 2

There was some really gnarly flaky swelling around the bottom of the cabinet and I wanted to take care of this first. Initially I had wanted to just cut off the bottom 12 inches of MDF and replace it with fresh MDF but thought I'd give something else a try instead. I basically soaked the bottom edge in wood glue and then clamped the MDF down to it's regular thickness between 2 pieces of sheet metal. The clamps and sheet metal were removed once the glue dried and it had worked out great!

Virtually every edge on the cabinet was nicked or swollen so I went around and cut off the edge at a 45 degree angle to prepare for Bondo re-edging.

Use a utility knife to remove all swollen or damaged corners.
Try not to angle cut deeper than 45 degrees.

I have seen people use masking tape attached to the outside of the edge to create a new edge when Bondo was applied. I initially used tape, but found that pieces of cardboard stapled to the edge held up better and it was also cheaper in the long run.

Use masking tape/cardboard to create a mold for your new corners. Take your time:
You want to replicate the original 90 degree angle as closely as possible.
Once the Bondo had dried it then became time to sand the mess up. Sanding the MDF created a funky looking cracked ice pattern whereever there was swelling. 

Remove the mold once the Bondo has dried and sand off and high areas. Start with low grit paper,
use Bondo to refill any missing areas or chunks that broke off, then resand with low grit paper.
Once you are confidant with your edges, gradually increase paper grit.


The next step, after sanding out all the imperfections, was to roll on some primer to check my work and then move onto painting. This is when everything started coming together. In between the Priming, Sanding, Painting, Sanding, etc, I was working on making a new back door and touching up the control panel.

Remember to prime after your final sand to check for any hidden imperfections.  I went with
Rustoleum White Enamel for paint because acrylic paint can't take (any) abuse.


Monday, November 16, 2015

Contra Konami Cabinet Restoration

I've always wanted to own an arcade cabinet. Sometime around 2005, I was set on getting an arcade cabinet and converting it into a Marvel vs Capcom machine that resembled the cabinet my friends and I used to play at Milford Amusement Center. Being young and impatient, I jumped on the first empty cabinet that showed up in the Connecticut craigslist ads and picked it up. Unfortunately, I didn't have the drive to finish back then so I put the cabinet on hold and left it in my Dad's basement (sorry Dad.)

8ish years pass. The combination of getting out of an apartment and moving into a house, and feeling nostalgic for the old arcade days reignited the spark. I started stalking Craigslist again for something resembling the old MVC cabinet of my youth. Once again, I jumped on the first reply I got from a seller. $50 and a Uhaul truck rental got me Contra in a dedicated Konami cabinet from a guy in Sumner, WA. The seller said it worked and that he just couldn't get the controls to work.


Post Hardware/Monitor Gutting


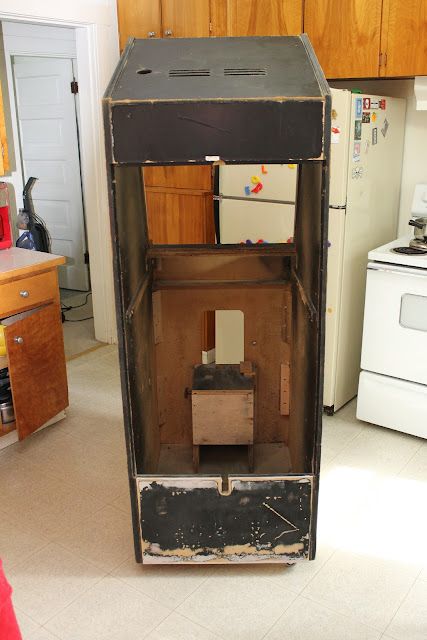
I checked out the cabinet once I got home and noticed this thing was in BAD SHAPE. The MDF on the bottom 1/4 of the cabinet was water damaged and swollen. Most of the metal (screws, bolts, nuts, speaker grills, you name it) were rusty. The isolation transformers looked scary. The cam locks in the coin doors had been drilled out, the marquee light did not work, and there was no back door to the cabinet.

I lurked on the KLOV forums for suggestions and the resounding advice was to use the cabinet as a pattern to cut a new replacement cabinet. That wasn't going to happen as I don't have the tools or know how, so I decided on giving it my all and restoring it as best as I can.


Next step: Roll it outside, and sand this beast down.

Sunday, August 2, 2015

Commodore 1702

One of my latest finds is a Commodore 1702 Monitor. Found this piece of history at a no-name thrift shop a town away from home. In my opinion, no-name thrift stores, and even antique malls, are where the gems are to be found. This addition to my collection was a steal at $20. If I had found this at Value Village it probably would have been jacked up to $200 or something (Thank you local Value Village hipster employees.)

The Commodore 1702 is the matching monitor to the Commodore 64, an 8-bit computer that was immensely popular in the 80's. Due to it's RCA Composite and RCA Luma Chroma inputs, it's not uncommon to find someone using the 1702 for DVD Playback, Gaming, or even Professional/Amateur video editing. This is where the 1702 truly shines - it's versatility.

Personally, I love the way NES plays on this thing. The 1702 only has one speaker and mono sound so it's perfect on it's own for the NES. The design of the Monitor, with it's grey color and abundant vents, looks like it was designed to match the NES.

Inputs:

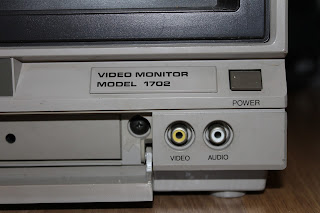
The 1702 offers RCA Composite A/V in the front and RCA Luma Chroma in the back. Also on the back input is a switch that toggles in between front input and back input. There is only one audio channel on the monitor regardless of whether it is set to Front of Real signal. Plugging your audio into the front and video in the back will result in audio playing regardless of whether it's set for Front or Rear. In order to use the Luma Chroma inputs with a console, a converter is needed to convert the console's male s-video mini-DIN to male Luma/Chroma RCA. Soon to follow will be a post on how to make one of these...

Front Inputs
 
Back Inputs and Switch

Settings:

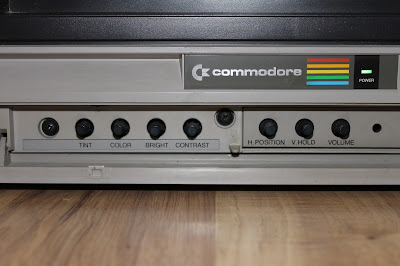
There is no service mode or OSD settings for the 1702. Everything is done using the convenient potentiometers located behind the flip down cover below the screen. Volume is also controlled here. There are apparently pots inside the monitor that I have not yet fiddled with.


Monitor in action:

As said before, I love the way NES looks on this CRT. This is Ninja Gaiden 2 on an original NES via RCA composite and EVO on SNES via standard first party RCA cables.


Saturday, July 11, 2015

Your reflexes just aren't as good as they used to be, Grandpa.

You know you've been there before. You're at a friends house and, unexpectedly, friend says, "Hey! Look what I found in the attic!", as he brandishes a dusty NES from a ragged brown box. "Let's hook it up to our brand new 40" 1080p HDTV and play some Super Mario Bros!" This should be fun, right? 

Wrong.

You know the feeling.
You just spent 3 lives trying to get past that god damn first Goomba. You feel like you're either drunk, or the entire mushroom kingdom has been flooded with molasses and then compressed in JPG format. Someone inevitably says that you're either getting old, or you're out of practice but you know they are wrong. These games are embedded into your psyche... You would sooner forget how to ride a bike!

So why?

It's simple: older consoles output at 240p and HDTVs do not. HDTVs need to rescale the 240p image into a resolution it can display and this results in lag and those butt ugly artifacts that, comparatively, make an NES hooked up via RF Switch look like gold. 

"State of the Art
High Resolution Graphics"
So you want to play your old games without lag and don't want to shell out a butt ton of money on converters and other expensive stuff for your HDTV? The solution is simple, usually free, and probably even in your basement. The glorious CRT.

Mom wouldn't part with her CRT and the the one in the basement doesn't even have a coaxial input. Now what?

Do not despair! Craigslist.org is the best place I have found to get CRTs on the cheap, or even free. You may need to be patient waiting for a TV that doesn't immediately get snatched up but you will eventually find one. Some CL posters will even take the time to let you know what hook ups it has, the model number, or if it has any problems. Other CL posters will just want it gone so you will need to find out yourself.

If your too worried about being kidnapped and/or shanked using Craigslist then there are other options. Goodwill stores in North America still sell old TVs. The stores I have been to usually sell them between $10-$50. Tag/Garage sales are also a good option and you can even potentially bargain with the owner. 

Remember, Friends don't let friends retro game on HDTVs!